How To Setup HomeSafe Outdoor Siren(s), Match Sensor(s) & Remote Control(s)
Updated 01-14-2021
About the siren and sensors:
The siren is the system controller. Remote controls and sensors are matched to the siren to make it a functioning panic alarm and, or intruder alarm system.
The siren can be purchased alone and then you can purchase remote controls and three types of sensors separately to make the system you want. Up to 8 total sensors and/or remote controls can be added to a siren. You can also purchase additional sirens to work together with the same remote controls and sensors being matched to each siren. Each siren would need to be in range of a remote control to be triggered for a panic alarm or to be armed for a burglar alarm.
We offer bundles that can be purchased:
One includes the siren and a remote control that makes the system a panic only alarm.
A second bundle includes a siren, remote control, and adjustable sensor. This expands the system to include a panic alarm and burglar alarm.
All systems require a simple setup before they will work. Up to a total of 8 sensors and/or remote controls can be added to each Siren system at any time. These same sensors can be added to our barking dog alarm system found on our barking dog alarm page here .
Enhanced set up instructions:
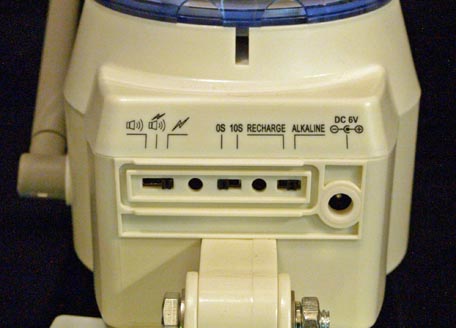
The siren operates with a included USA 2 prong switching 120-240 volt AC to 6 Volt DC power adaptor and uses 4 AAA batteries (not included) as a backup power source. The adaptor plugs into a port at the bottom of the Siren.
There are control switches on the bottom of the siren. These switches allow you to control 3 alarm functions: siren + signal light, signal light only, siren only, delay timer 0-10s. There is also an option for rechargeable batteries. Only use the recharge setting with batteries designed for recharging.
Remote Control(s) and Sensor(s) must be matched, one at a time, to the Siren before the system will work together.
Additional sirens can be added to the system by matching the same sensor/or remotes to each siren. If you change your mind after matching sensors to more than one siren the memory can be cleared so you can start over. More on that is below.
Matching instructions for the HomeSafe Outdoor Siren, Motion Sensor(s) and Remote Control(s):
The siren manual has instruction for many different situations and sensors. We have tried to simplify that some here for a stand alone system.
IMPORTANT!: Each sensor or remote control must be added to the siren one at a time. Only one signal can be matched (learned) at a time. If you have multiple sensors to match, or already own sensors, be sure that only the one you are matching is sending a signal. Be sure that there are no other wireless devices, such as wireless camera systems, other wireless alarms, etc. running during matching. We don’t want to match them to the siren. The chance of anything matching is remote, but we want to be sure. (WIFI is not affected).
TIP: A good way to be sure no signal is being sent is to place the motion sensor(s) NOT being learned against a wall, corner or in a drawer, so that it does not see movement.
Matching the remote control:
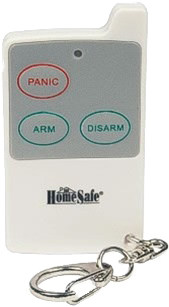
Wipe the battery to remove any residue that might inhibit connection. Place the battery in the remote control. You should see a red led on the remote when you push any button. (This button battery should be replaced every 6 months. As the battery weakens you might notice that you have to be closer to the alarm for it to function. Average distance to function with the siren is 65 feet.)
Plug in the Outdoor Siren to power using the included 6 volt dc adaptor.
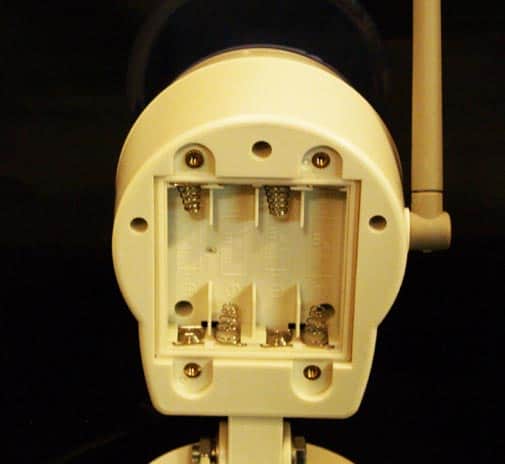
In the battery compartment of the siren is a push button labeled LEARN. It is the same color as everything else, so it may be hard to see at first. We have placed a pen mark on the button in the battery compartment photo above. You may need a pen point or paper clip to push the button.
Hold down the learn button until you hear a beep tone; about 2 seconds. (The siren will only stay in the learn mode about 20 seconds.) Press any button on the remote control. You should hear two short beep tones. If you heard 4 short beep tones, the match failed and you will need to do it again starting with the push button marked learn.
For Matching Motion Sensor(s):
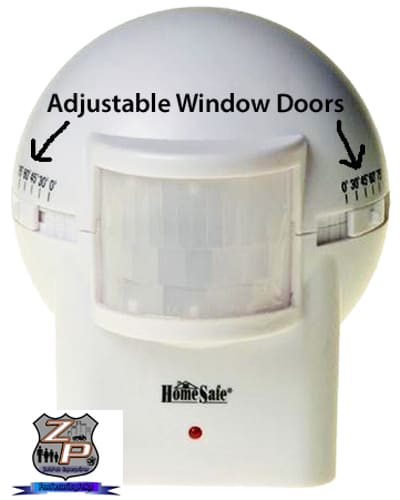
Keep the siren in unarmed/standby mode. Place the batterie(s) in the Motion Sensor and wait one minute for the sensor to setup. After the motion sensor is setup you will see the red led on the sensor blink when it detects movement.
Push the LEARN button in the siren battery compartment until you hear the beep tone (about 2 seconds).
Wave the sensor, or wave your hand in front of the sensor to cause a signal to be sent to the siren.
You should hear two short beep tones. If you heard 4 short beep tones, the match failed and you will need to do it again.
Notes about the Motion Sensors:
These are motion or movement sensors. They are designed to detect anything that moves; including animals.
The adjustable indoor/outdoor sensor has two adjustable doors on each side of the sensor that can be closed down to reduce what the sensor sees.
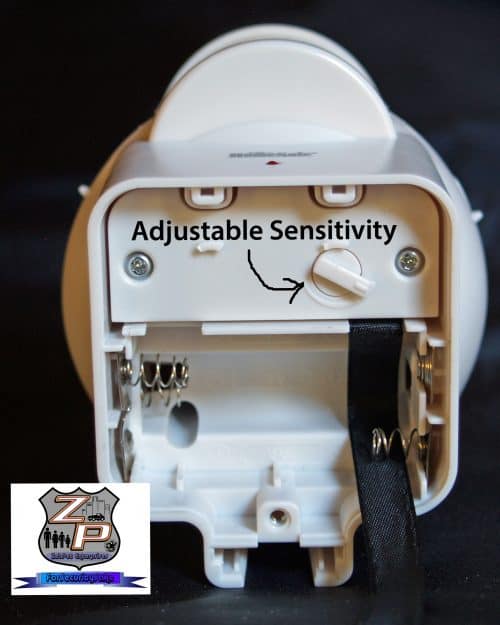
There is a sensitivity adjustment in the battery compartment to reduce or increase detection distance from the sensor .
On the back of the sensor package there is a graphic that shows the angle of detection from the sensor.
Consider those adjustments, along with the location you mount the sensor to reduce the possibility of false alarms. We recommend that each individual sensor be tested in the desired location before mounting permanently, in case the sensor needs to be moved or tilted to help you detect just what you want. (You can set the siren on flashing light only for testing.)
The Door/Window Sensor/Vibration sensor:
Tape the two parts of the magnetic sensor together. ( if these are apart, the sensor will continuously trigger)
Place a battery in the battery compartment and wait one minute for the sensor to set up. Push the LEARN button in the siren battery compartment until you hear the beep tone (about 2 seconds). To activate the sensor, remove the magnets away from each other, or vibrate the sensor box. You should hear two short beep tones. If you heard 4 short beep tones, the match failed and you will need to do it again.
Your unit is now ready to work.
Arm the siren by using the panic button of the remote control for an immediate panic alarm or use the arm button of the remote control to set up for a burglar alarm.
Important ! When you arm the siren, it will take about 1 minute to setup before it will activate with sensors. An exception to this is; you can use the panic button of the remote and It should sound and/or flash immediately depending on how you have the siren setup.
After everything is matched and ready to operate, the siren has two small LEDs that you should see:
Solid Green: Siren is plugged into 6 volt power via the adaptor port plug.
Solid Red: Siren is arming (Three tones will also be heard when arming via the remote control. In about 60 seconds your will hear another one tone indicating the siren is armed and ready.
Three red flashes with a pause and three red flash sequence: Usually means there are weak or no batteries available for backup. (This will not interfere with the alarm function as long as there is power).
Fast Flashing Red: Siren is preparing to disarm (usually when disarm is pressed on the remote control). There will also be a tone indicating the siren is disarming.
The siren is designed to be plugged into power. The batteries are designed to be a backup only if the power fails. When running on batteries, the siren goes into a power saving mode. As an example; the bright flashing blue light that activates when the siren is triggered will be dim.
You can add 8 total sensors and/or remote controls to the unit if you wish. You can find them on our website by clicking here .


Hi,
I just ordered the Homesafe siren and remote. I just want to use it as a panic alarm via remote. Do I need a sensor for this?
The HomeSafe Wireless Outdoor Siren with Flashing Light will act as a Panic Alarm when you add the remote control. No other sensor is required for this purpose.
can I activate two sirens at once using one remote? What is the range in feet of the wireless remote?
Can I activate two sirens at once using one remote? Yes you can. Just match the remote control to both sirens with the learn button on each siren.
What is the range in feet of the wireless remote?: With a fresh battery, Range is up to 30 meters (98 feet), 20 meters (65 feet) is average performance. We recommend that the remote control battery be switched out every six months.
Pingback: How To Use The HomeSafe Wireless Siren As A Silent Doorbell
I matched the remotes to the siren just fine, but am having difficulty matching the sensors. I went by the instructions, but still get only the 4 beeps.
Hi David Smothers,
I show an order from you in 2016. If you are attempting to match a new sensor, make sure no other sensors are sending a signal. Only one sensor can be matched at a time.
You can find enhanced instructions at this link: https://forsecuritysake.com/how-to-setup-homesafe-outdoor-sirens-match-sensors-remote-controls/
If you have further questions, you can reach me at Zeb@ForSecuritySake.com
Be Safe Out There!